Introduction
PyGeneses is a PyTorch based Deep Reinforcement Learning framework that helps users to simulate artificial agents in bio-inspired environments. The framework provides in-built Deep RL algorithms and visualization of results from training in an interactive dashboard. The environments are a simplified abstraction of our real world, agents are put into this world and are allowed to interact with each other and the environment. PyGeneses has been recently open sourced under GNU GPL v3. For a TLDR - TLDR;
The power of PyGeneses is its clean and simple API which:
-
Allows a user to run own simulation even if they have no knowledge about RL or DL.
-
Allows a user with experience in Deep RL to tweak the model and parameters extensively.
What’s exciting about PyGeneses you ask, well, PyGeneses lets you create a working simulation by writing as little as 2 lines without any prerequisite knowledge whatsoever!! PyGeneses also provides tools that will help you visualize the results with minimal effort. So what are you waiting for, install PyGeneses today and become the god of your creation.
Use cases
Pygeneses can be used for a variety of purposes, the limit only being your creativity and imagination. That being said, some of the use-cases of pygeneses can be:
-
To understand basic psychology - Since every agent has a limited actions to choose from in each time step, the simulation can be studied to infer the basic psychological patterns displayed, this can help to understand the similarities/dissimilarities between the agents and real life organisms.
-
To create applications/games based on the framework - You can create basic applications/games based on our framework. An example can be a productivity app that adds food to the simulation only when the user completes a task, hence staking the lives of the agents of the user’s own simulation in exchange for productivity.
-
To learn more about Deep Reinforcement Learning - Users can just tinker around with different hyperparameters and models and observe the results visually, this makes for a interesting way to get an insight into the world of Deep Reinforcement Learning.
Installation
PyGeneses can be installed using pip in either your local system or a cloud based platform. The steps for installation will be the same for both cloud and own systems.
user@programmer~:$ pip install git+https://github.com/Project-DC/pygeneses
About packages
As of version 0.1-beta, the architecture of PyGeneses is built around 4 major modules. Each of these modules provides a unique feature or functionality to the framework. So, let’s get started with a brief introduction to each of them.
-
envs
This module allows you to create, configure and tweak the in-built bio-inspired environments. As of now, this only provides a single environment called Prima Vita (First Life), but there’s more coming soon! This lets you set up the entire environment and the species in just a few lines of code and provides both high level API and low level control over the environment. Training using the API includes logging of every action of an agent so that it can be studied using VitaBoard.
-
models
The ‘models’ module is what allows us to import the neural networks which the species uses to learn what to do. As of now, only the default model's (REINFORCE) implementation is provided, but we will be adding support for custom pluggable networks from v0.2 onwards.
-
hypertune
The ‘HyperTune’ package allows us to configure and test out various hyperparameters we can provide for an environment and species (a list of hyperparameters is provided in the Classes section of this documentation). This contains single hyperparameter testing, grid search and randomized search. This allows us to find the best set of hyperparameters to display a type of behavior. This also produces logs which we can study using Vitaboard.
-
vitaboard
Vitaboard provides an advanced, interactive dashboard to study agents after the training phase. After each agent dies, his/her actions are written into a log file. And vitaboard allows us to visualize the agent's life. It provides us with a life visualizer, group statistics and a genetic history visualizer. It allows us to identify and understand behaviours exhibited by an agent while interacting with the environment or with other agents in the environment.
Agents

Meet ‘100-456’ an agent belonging to Prima vita species. In this section we will look at how this or any other agent interacts with food particles and other agents in the Prima Vita environment.
-
States
The state of an agent can be described as the experiences of the agent at a particular time step in the environment. The state has 3 components - (1) distance vectors to food particles within a fixed radius, (2) distance vectors to other agents and their gender within the same radius, and (3) the energy of the agent at the current time step. The state is padded to a fixed length before being passed to the neural network.
-
Actions and reward
Actions are what the agent chooses to do after experiencing a particular state. An agent in the Prima Vita environment can choose form 13 different actions:-
S.No Action Reward 01 Move left -2 02 Move right -2 03 Move up -2 04 Move down -2 05 Move up then left (North west) -2 06 Move up then right (North east) -2 07 Move down then left (South east) -2 08 Move down then right (South west) -2 09 Stay at one place -4 (decays to -1) 10 Food ingestion initial_energy / current_energy 11 Asexual reproduction initial_energy / current_energy 12 Sexual reproduction initial_energy / current_energy 13 Fighting -10 Disclaimer: The current implementation of sexual reproduction and fighting are done in a way that if an agent takes any of these actions and another agent (of opposite gender in case of sexual reproduction or any gender in case of fighting) is present in its radius then the action is completed successfully without the consent of the other agent. We (the developers) of PyGeneses do not promote non-consensual sex and fighting, this approach is taken here only for the sake of simplicity.
-
Log files
Log files contain information about every action that an agent takes throughout its lifetime. When an agent dies all that information is dumped into the log file. This also contains the players initial x-y coordinates in the environment and the id and time of birth or parent(s). The log file can be used to study the behaviour of the agents using VitaBoard. The name of a log file is in the following format: time of birth-unique id.npy (now you know why the agent was named 100-456.npy).
Examples
-
Model Training (pygeneses.envs)
-
Example 1
Note: This is training with default Hyperparameter setting and REINFORCE algorithm
The three steps to train agents are:-
-
Import PrimaVita class from envs.prima_vita
-
Instantiate the PrimaVita class
-
Call the run( ) method on the PrimaVita object
The above default setting will allow you to train the agents in ‘bot’ mode which means you will not be able to see the environment while training. In case, you want to see the environment throughout the training you just need to change the mode to ‘human’. The snippet belows shows the code for 'human' mode.
-
-
Example 2
Note: Changing the default hyperparameters
You just have to pass a dictionary with keys as the name of the hyperparameter (here the initial energy of agents and the time in ticks after which model will be updated are changed) and the values as the value you want to specify. For a more detailed list of available hyperparameters refer to the Classes section.
-
-
Hypertune (pygeneses.hypertune)
-
Grid Search
This takes in a pool of hyperparameter values as input and trains the model with all the possible combinations of these values. This is useful when you want to try out different values of a hyperparameter or group of hyperparameters.
Following is a snippet of code for applying a grid search over pool of hyperparameters using hypertune:-
-
Randomized Search
This takes in a pool of hyperparameter values as input and but unlike Grid Search, it trains the model only on a handful of combinations which is a subset of all possible combinations and the combinations in this subset is chosen randomly based on a probability
Following is a snippet of code for applying a randomised search over a pool of hyperparameters using hypertune:-
The only change in this code and the grid search code is the extra parameter randomize_percent (between 0 and 1) which tells the randomized search algorithm the percentage of combinations to pick up randomly from the pool of available hyperparameters.
-
-
Vitaboard (pygeneses.vitaboard)
VitaBoard is installed with PyGeneses, so you do not need to install VitaBoard separately. To run VitaBoard just run the following command from your terminal:
user@programmer~:$ vitaboard-
Steps to run
Run the command vitaboard in your terminal
Open localhost:5000 or 127.0.0.1:5000 in any browser
-
VitaViz
The first thing you see after opening vitaboard is this window:

This is the VitaViz Tab. Here you need to enter the path of the log file that you want to visualize in first field and the speed at which you want to visualise the simulation in the second field ( an Input of 1 means the simulation will be shown at 1 frame/s).
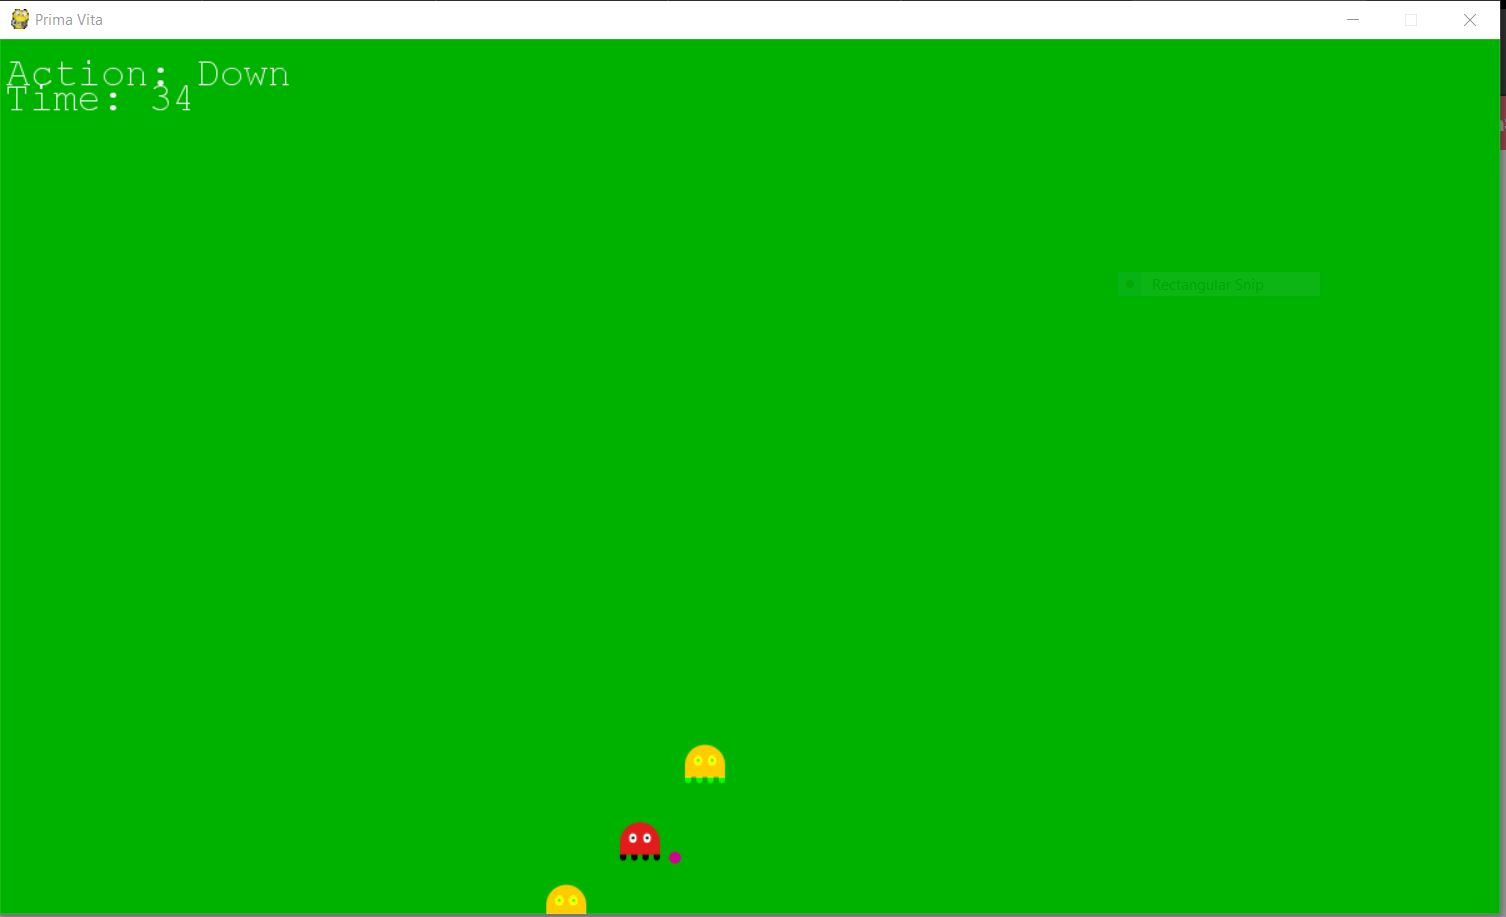
After entering the required fields and hitting ‘Run’, a pygame window will open which will display the simulation:
-
VitaGroups
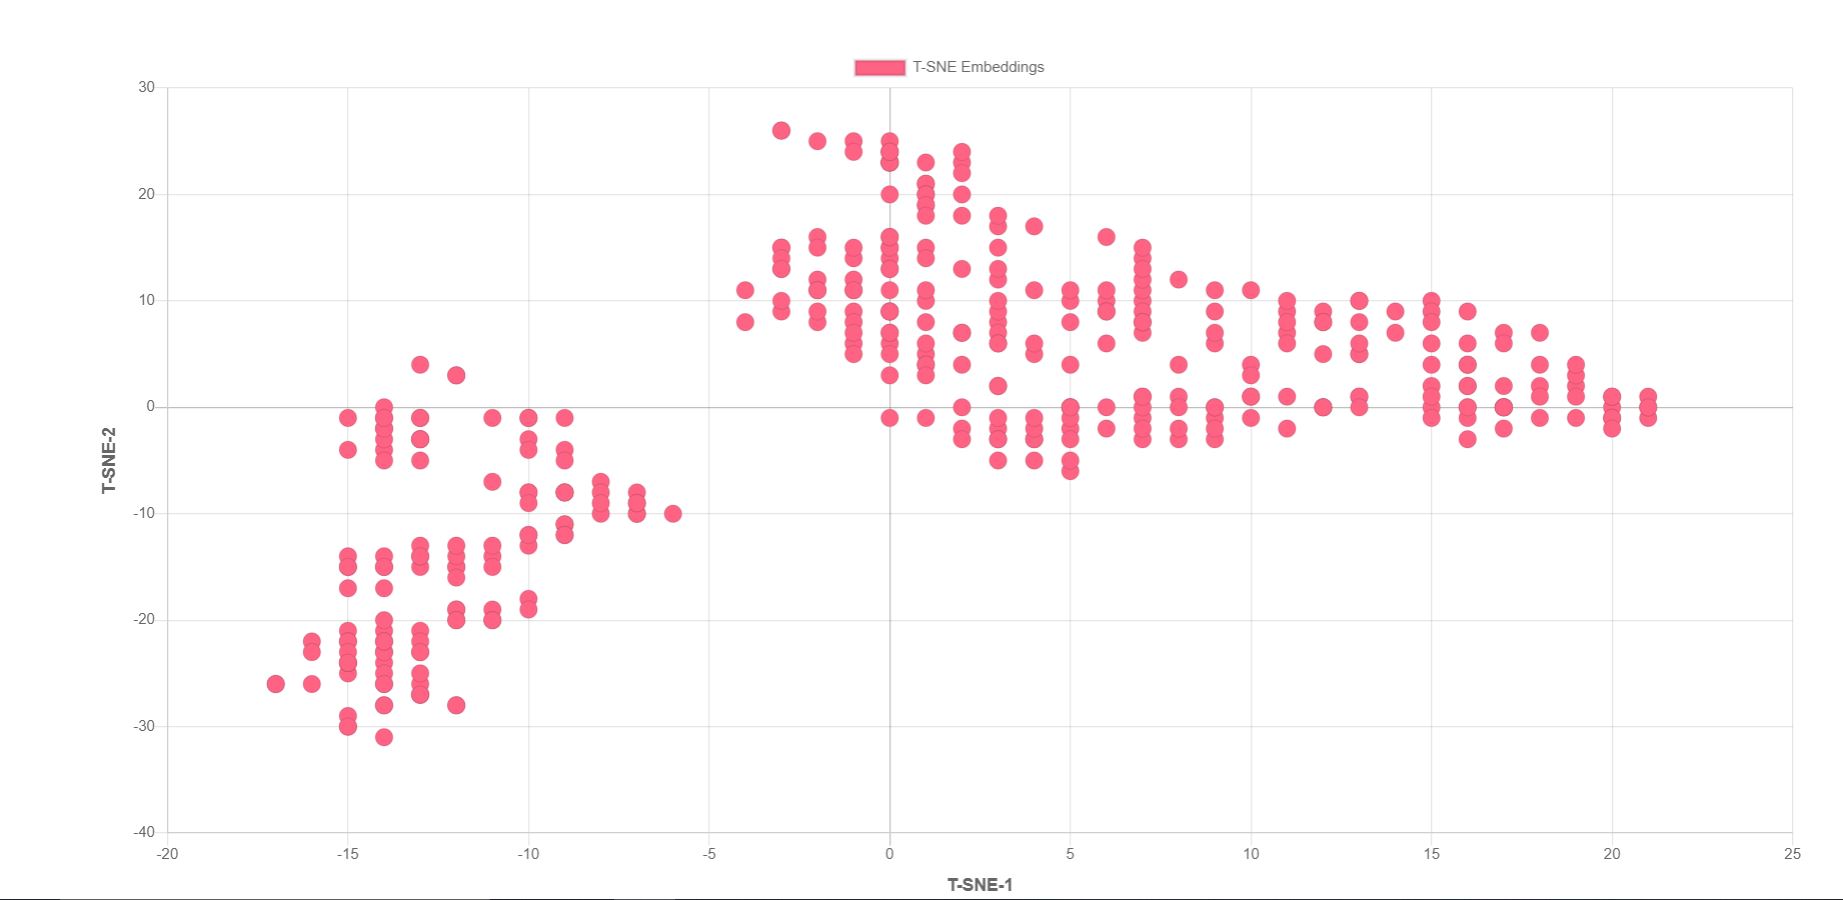
The second tab is VitaGroups, which is used to form clusters of agents (based on their Neural Network embeddings). This tab looks something like this:

After entering the address on the directory containing the log files, press ‘Get Groups’, this will generate and show you the clusters. These data points are generated by reducing the dimensionality of the agent’s trained embeddings into two dimensions using t-SNE (t-distributed Stochastic Neighbour Embeddings).
Here you can click on any node and the name of that player will be displayed below, clicking on the name will enable you to visualize the life of that player (similar to VitaViz).
-
VitaStats
The next tab is VitaStats which helps us visualise various statistics about the agents (players).

After entering the address of the folder in the field, hit ‘Get Stats’, Various graphs will be generated and displayed.

Here you can click on any node to get a list of players born at that time-step. Clicking on any element of the list will enable you to visualize the life of the player.
The First Graph shows the relation between the average of the ages of death of players born at a particular time and the time. This can be used to study the trends in the lifespans of the agents.
The second graph shows the relation between the variance in death ages of players born at a particular time and the time. This graph can be used to realise the similarities/dissimilarities in the death age of players born under at the same time and living in similar circumstances.
The third graph maps the relation between the Quality of Life and the time. Here by quality of life we mean the count of players born at a particular time who survived for more than 50 timesteps (in ticks).
-
VitaLineage
The last tab is VitaLineage, here we can pass the address of the log file of any agent and see their family tree.
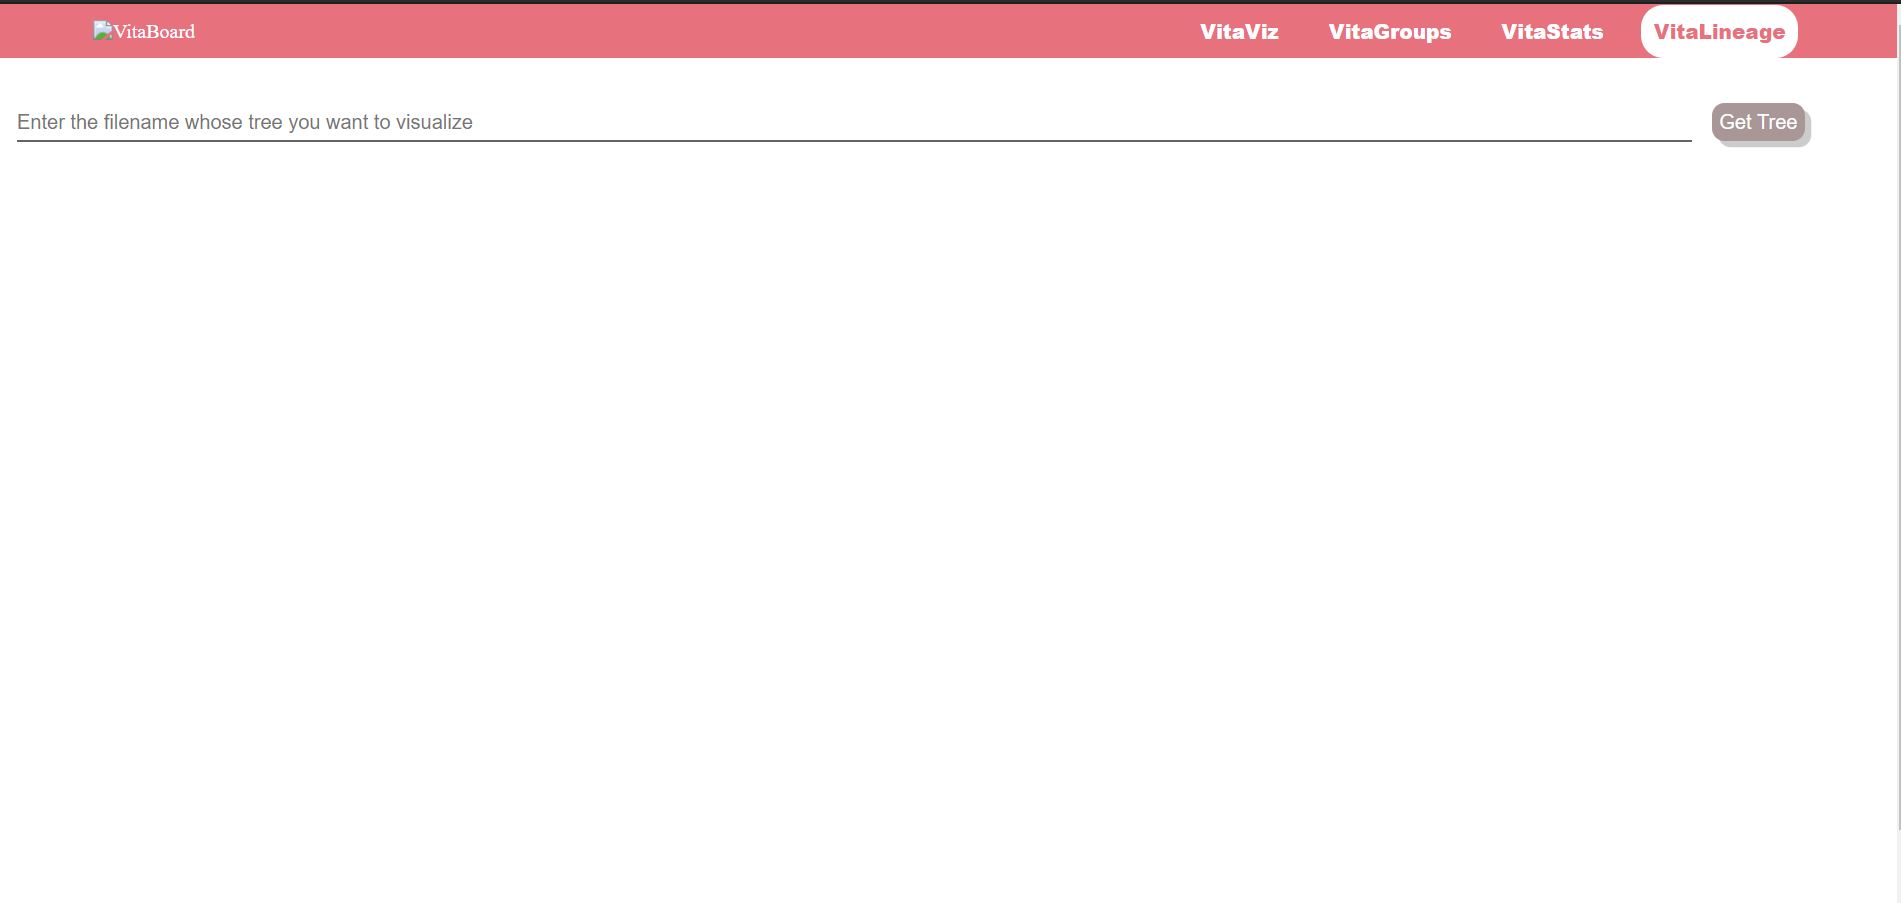
After entering the address, click on ‘Get Tree’ to see the family tree of the player.
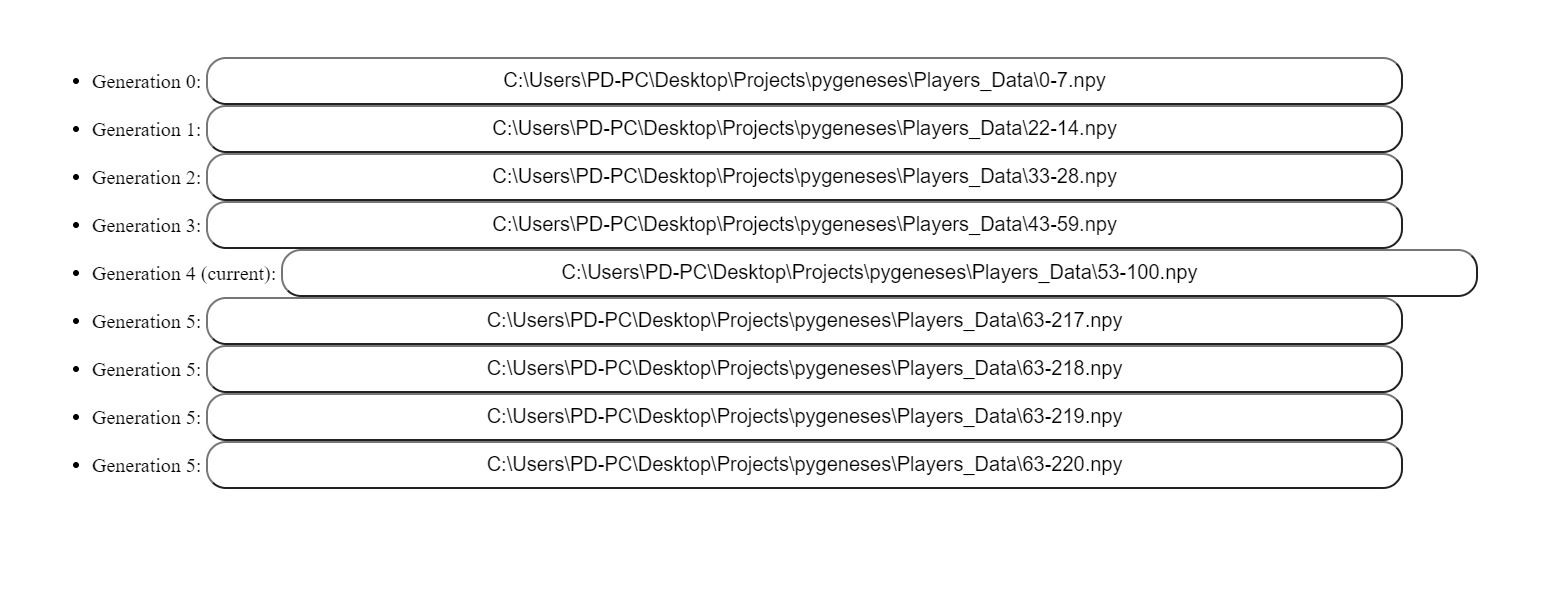
Click on any node of the tree to visualise the life of the player.
-
Classes
-
PrimaVita()
The class for our first environment which includes a single species called Prima vita (First life). This is exposed in the front end API from where user can instantiate this class to train their model.
The following are the hyperparameters which can be set for this class:-
S.No Hyperparameter Default Value Description 01 initial_population 10 This is the count of agents which will be present when training is started. These people will be born at time step 0. 02 state_size 21 The size to which the state of an agent is to be padded, if the size of state increases then it will be removed, or if the size of the state for an agent is less than state_size then it will be padded with zeros to this length, otherwise if it is equal to state size then the state remains the same. State is what the agent perceives in its environment (state in our environment is distance vectors to food particles and other agents followed by current energy of an agent, it tells the agent how close it is to another agent or food particle and what is its current energy). The padding length will be 1 less than what is mentioned so as to accomodate the single value - energy. So, the default value of 21 will pad the vectors to 20 length after which energy is appended. 03 initial_energy 200 The energy with which each player/agent is born. This value will be same for all the agents across various generations and irrespective of how the agent was born or who his/her parent(s) were. 04 model_updates 10 Number of time step (in ticks) after which the neural network model for all the agents who are currently alive is updated. Here updation means backpropagation through the neural network which the agent uses for predicting action given a state as input. 05 speed 3 The speed with which an agent moves in a the environment or in simpler terms the number of pixels an agent moves after taking a single step. The default value of 3 means that the agent will move 3 pixels in each of the 8 direction if it takes a step in any of these directions. 06 max_age 90 The maximum age (in ticks) to which an agent can live, once an agent reaches this agent he/she dies of old age. 07 max_allowed_population 100 The maximum number of agents that can reside at once inside the environment, once crossed agents will be killed randomly using two different strategies. If however the value passed to this hyperparameter is -1 then there would not be a max cap on number of agents residing at one point. Though there is an option to have uncontrolled number of agents at once, we do not recommend this for best results. 08 kill_type "difference" The strategy to use while killing of people randomly after the environment has reached its max cap of population (if there is any). We offer two types of killing - (i) difference method where the number of people killed after max cap is reached is the increased population - max allowed population, which in a way equalizes the value of population at each time step to max allowed population, and (ii) random method where the number of people killed after max cap is chosen randomly. Note:- the values allowed for this hyperparameter are the strings - "difference" and "random" only. 09 sensory_radius 100 The radius inside which an agent can sense things. So, the default value of 100 means an agent can sense food particles and other agents within a 100 px radius. 10 decay_rate 23 The rate at which reward decays from initial -4 to a max of -1 when the agent chooses to stay at one place. The default value of 23 means after every 23 ticks of time the reward given to agent for choosing the stay action will increase by 1. A reward is a way for the environment to tell the agent whether the action taken was good or bad. All of these hyperparameters are set using the params_dic parameter of the PrimaVita initializer which takes in as input a dictionary with key value mappings of hyperparameter names and corresponding values.
Apart from these hyperparameters we have certain parameters for the PrimaVita initializer which you can set:-
S.No Parameter Default Value Description Usage 01 mode 'bot' The mode in which the training should proceed. There are only two options for this parameter (both are strings) - "bot" and "human". "bot" mode is when you do not want the pygame visualizer to start during training, which is recommended as the pygame visualizer slows down training. "human" mode is when you want to see the visualizer even during training. Pass as parameter to PrimaVita class. e.g. model = PrimaVita(mode='bot') 02 log_dir_info None This is what gets appended to the name of the log directory Players_Data. The default value of None generates log directory with timestamp (at the beginning of training) after Players_Data. This is used by the hypertune package to generate meaningful log directory names containing the name of hyperparameter and its value. Pass as parameter to PrimaVita class. e.g. model = PrimaVita(log_dir_info='my_train') -
HyperTuner()
The class for testing different combinations of hyperparameters and selecting the one which best fits the behaviour you wanted to explore in the agents. This offers two searching methods - grid search and randomized search.
The following parameters can be set for this class’ objects:-
S.No Parameter Description Optional/Mandatory Default Value 01 model_class The name of environment class to test the different hyperparameter values for. For now we only have a single environment - PrimaVita. Mandatory N/A 02 hyperparameters The name of hyperparameters to be tested passed as a python list. Mandatory N/A 03 values Values of the hyperparameters to be tested passed sequentially (following the order in which they appear in hyperparameters list). This will be a 2D python list. Mandatory N/A 04 stop_at Number of logs to be generated after which training will stop, if this is not mentioned the training will continue infinitely. Mandatory N/A 05 randomize_percent Setting this parameter converts the grid search into randomized search and the value (between 0 and 1) is the percentage of combinations that is chosen randomly for training models. Optional 1
Highlights
-
PyGeneses can be used for researching the various possible behaviours and trends by artificial agents. The artificial conditions programmatically provided to study their behaviour shows the result which can parallelly be compared to those of the real world conditions as the provided conditions are kept as close as possible in accordance with that of the natural laws.
-
PyGeneses is a tool to simulate a very primitive life. It can be used to train, study and analyse a complex artificial species as well but with more parameters and a more complex structure for the training model.
-
PyGeneses has been equipped with a dashboard to analyse the step by step behavior of the agent which is under observation after it gets trained in the model. This helps in understanding the reasons behind the agent’s particular behavior in the given circumstances and conditions.
-
PyGeneses can always be modified and updated to accumulate the new conditions and circumstances which could be included in the framework and then the agent’s behaviors could be observed under those conditions as well along with the old conditions to analyse the behavior changes.